Do you have an old LCD monitor at home? You can turn it into a “spy” monitor. While everybody sees it as a monitor with white screen, you will have special “magic” glasses to make it work. Here is an instruction on how to make a privacy monitor out of an LCD monitor.
You’ll need an LCD monitor, old glasses (disposable 3D glasses or sunglasses are fine), paper cutter, screwdriver, paper towels, superglue and paint thinner.
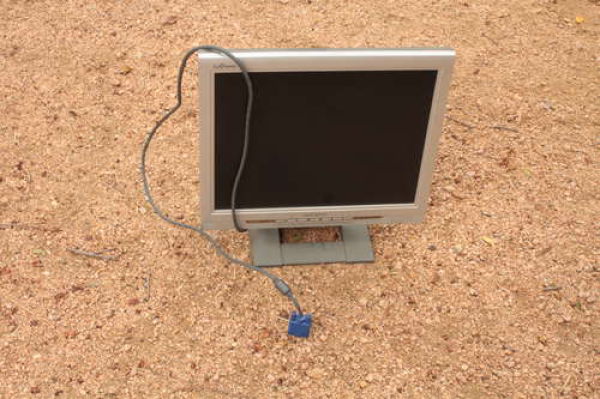
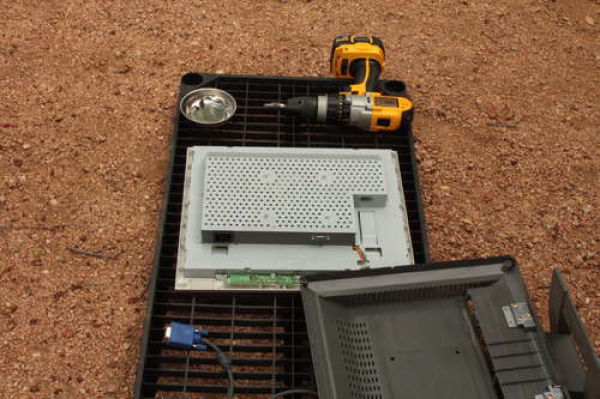
Step 1. LCD Monitor
Find an old monitor to work with.
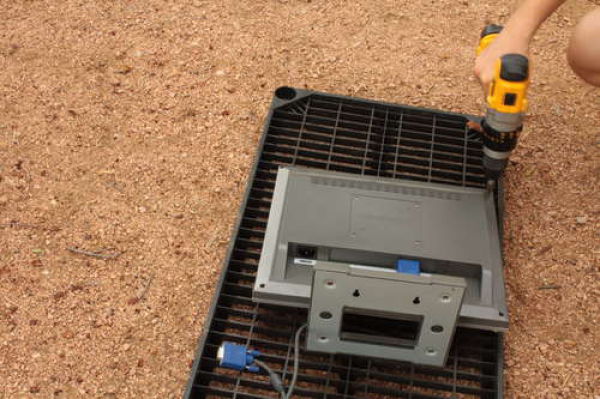
Unscrew all the screws on the back of it to remove the plastic frame.
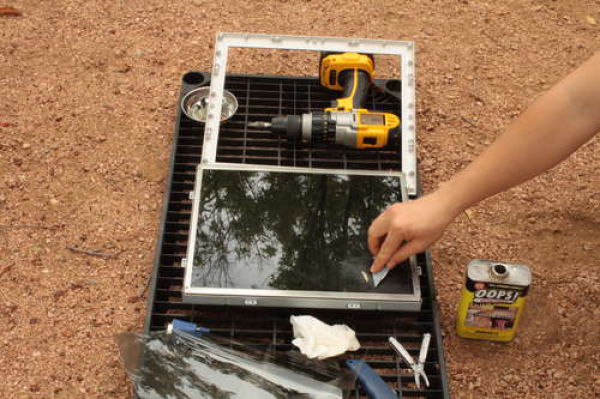
Step 2. Cutting a Polarizing Film
Most LCD monitors’ glass is covered with two films, a polarized one to filter out the light you are not supposed to see, and a frosted anti-glare film. We don’t need the anti-glare film. We’ll use the polarized film only for our glasses.
Grab your cutting knife and cut the films along the edge. Don’t be afraid to press hard. The metal will not scratch the glass unless it’s covered with sand or other abrasives.
Recommendations: The coverage of some monitors is not bonded. Sometimes you can just remove the protective metal edge of the matrix and get the films without cutting them out.
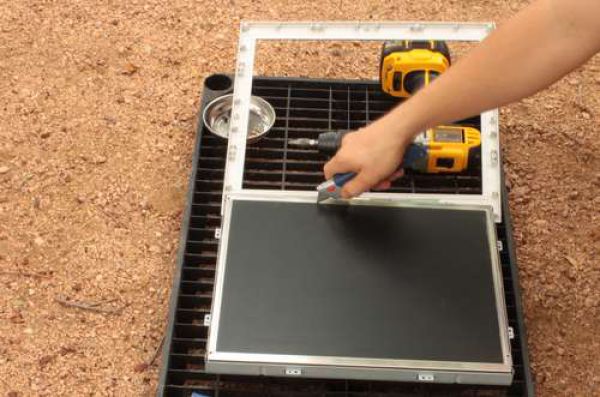
Then, start peeling. Make sure to save the polarized film, also remember the orientation.
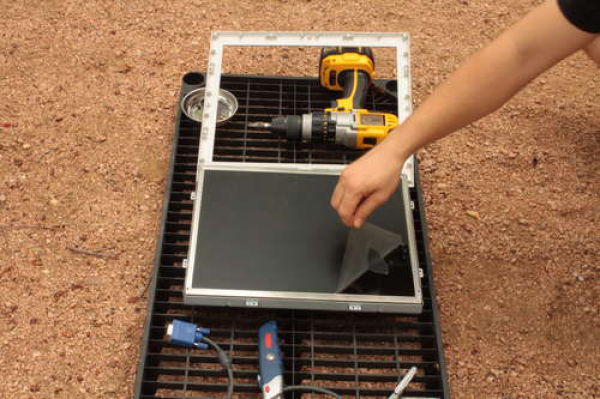
Step 3. Clean the Film Adhesive
Once you have removed the films, the glue has likely remained stuck to the glass. Here comes the messy part. Use solvent to soften the glue and wipe it off with paper towels.
Try to cover the screen with paper towels soaked in paint thinner. Or use a piece of wood or plastic to scrape off the soft glue.
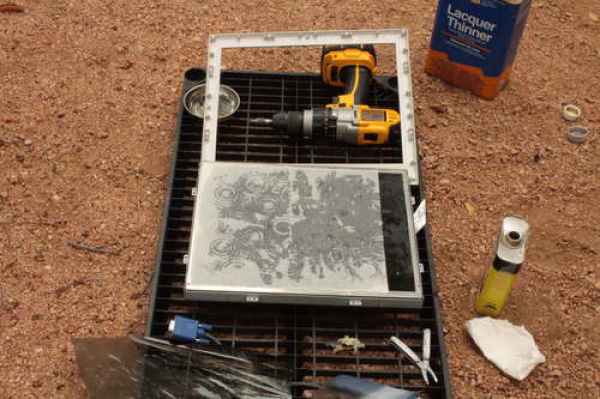
Be careful not to get paint thinner on the plastic frame, because it will dissolve it.
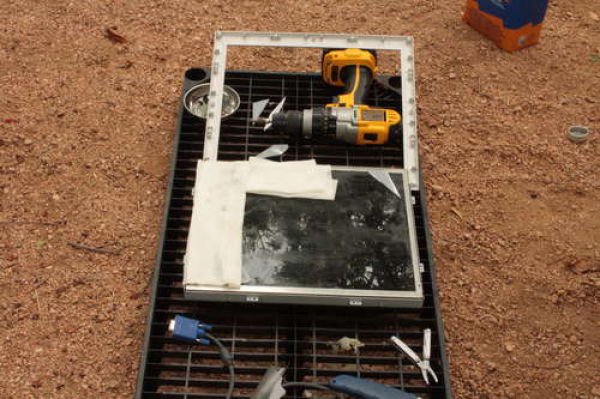
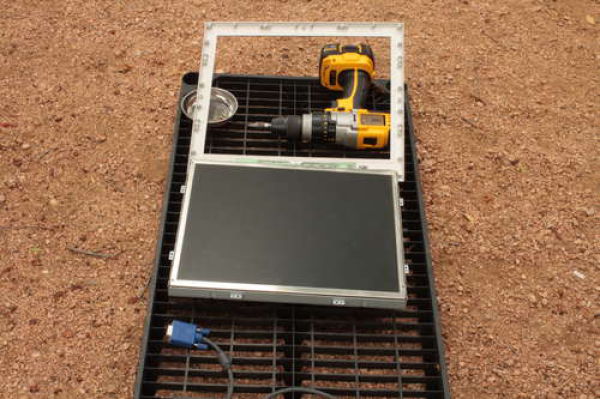
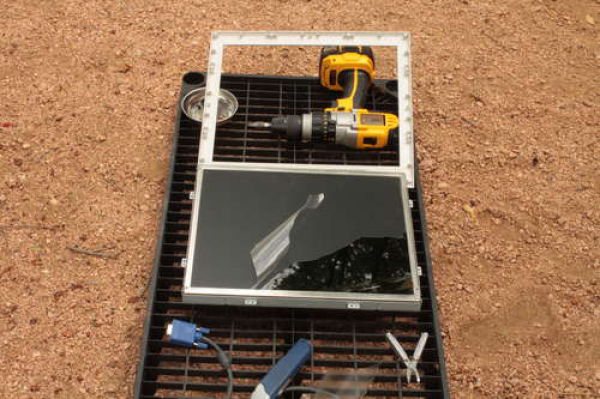
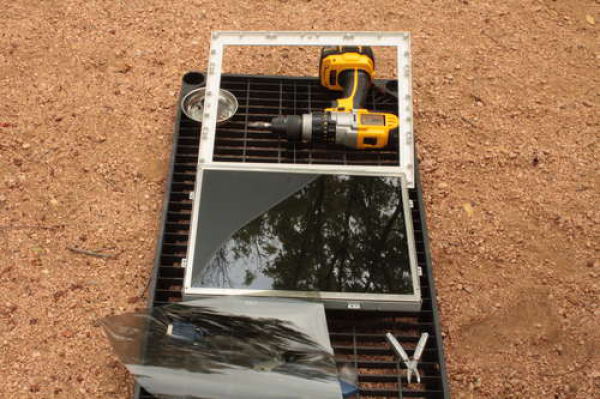
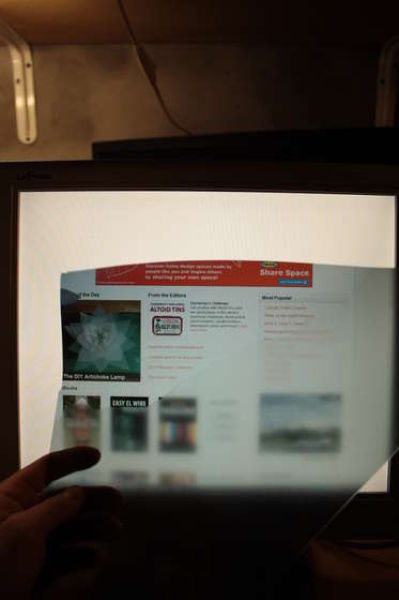
Step 4. Your Monitor Is Ready
After cleaning the adhesive, assemble everything back the way it was. Before even making the glasses, you can test the monitor with the polarized film.
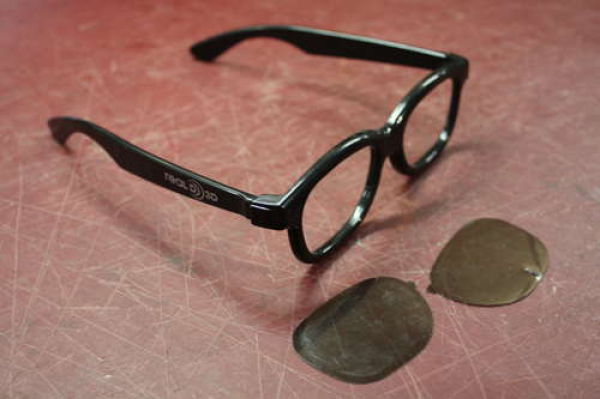
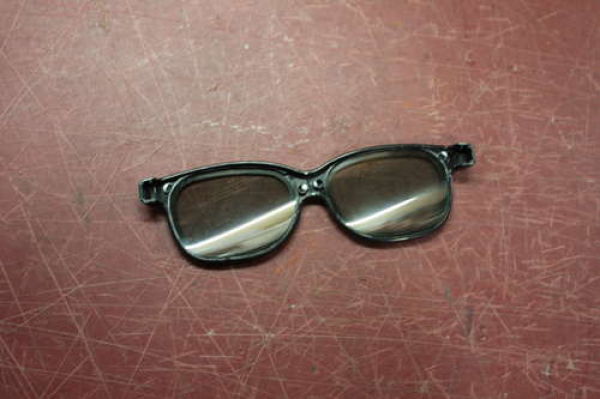
Step 5. Pop the Lenses out
Whatever glasses you are using, pop the lenses out of them or take your glasses apart if it is possible.
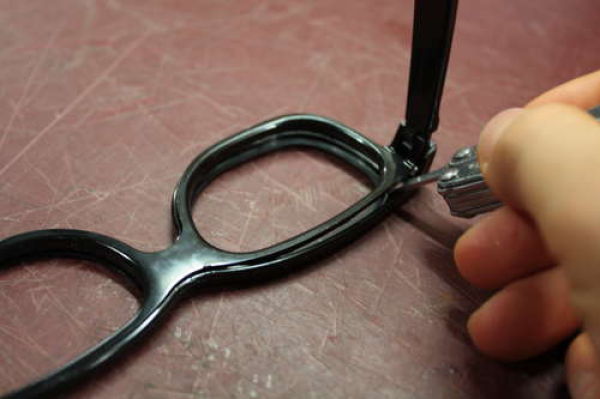
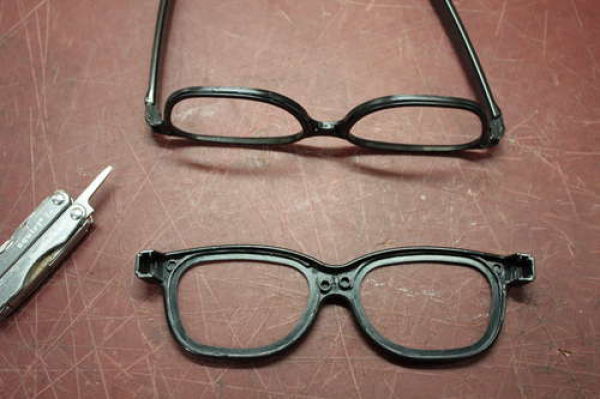
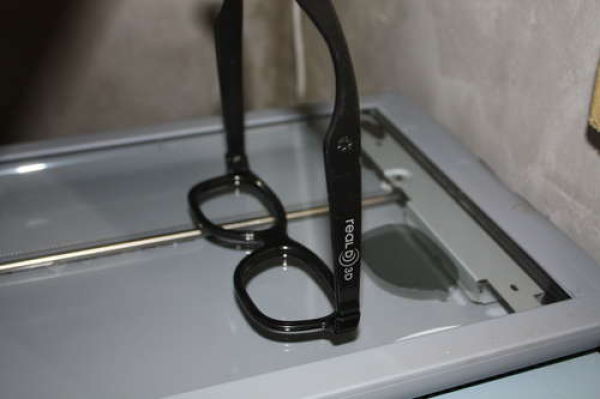
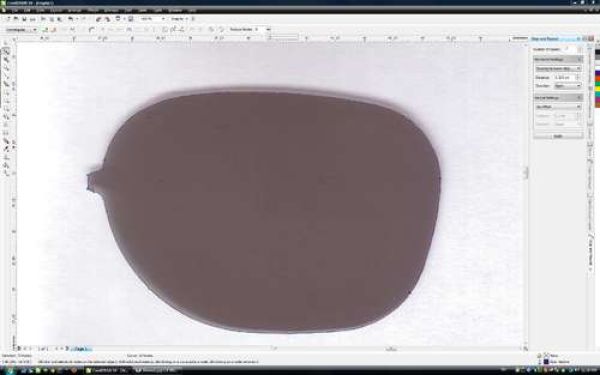
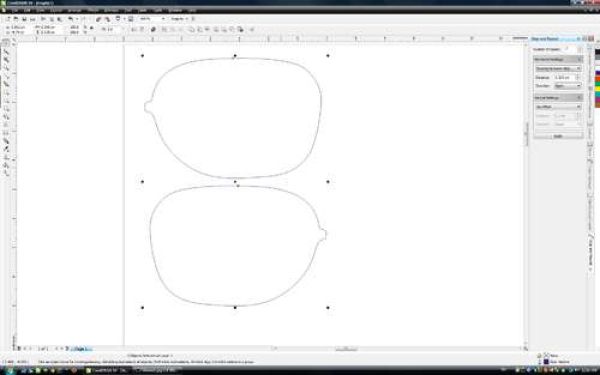
Step 6. Scan, Trace, Cut
If you are going to use a cnc blade or laser cutter, scan and trace the parts.
These frames were scanned so that they could be used as a reference for the lens orientation. Remember, this is a polarized film so the angle is critical. Back and front also matters.
You can also tape the old lenses on the film and then cut them out with an x-acto knife.
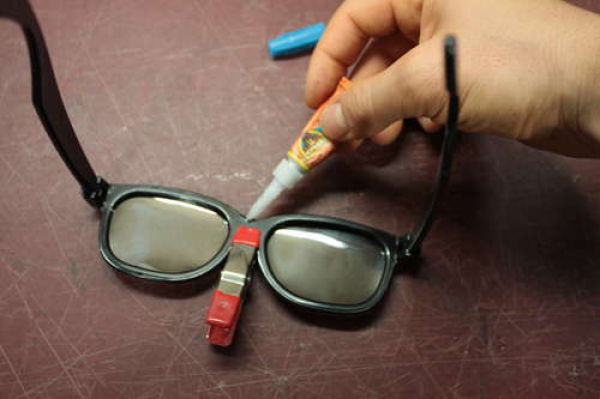
Step 7. Reassemble Glasses
It’s time to assemble the glasses. Are you ready for some fun?
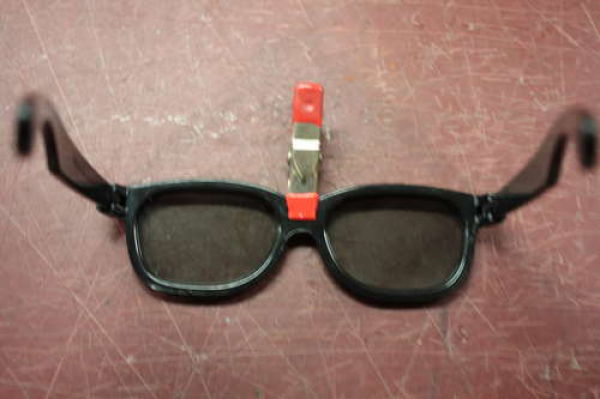
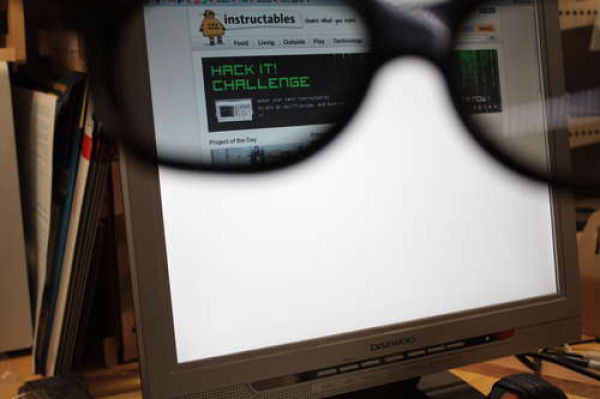
People might think you are crazy as they see you staring at a blank white screen and wearing sunglasses.
That makes it even more fun, doesn’t it?
Credits: www.cutyourway.com
Step 1. LCD Monitor
Find an old monitor to work with.
Unscrew all the screws on the back of it to remove the plastic frame.
Step 2. Cutting a Polarizing Film
Most LCD monitors’ glass is covered with two films, a polarized one to filter out the light you are not supposed to see, and a frosted anti-glare film. We don’t need the anti-glare film. We’ll use the polarized film only for our glasses.
Grab your cutting knife and cut the films along the edge. Don’t be afraid to press hard. The metal will not scratch the glass unless it’s covered with sand or other abrasives.
Recommendations: The coverage of some monitors is not bonded. Sometimes you can just remove the protective metal edge of the matrix and get the films without cutting them out.
Then, start peeling. Make sure to save the polarized film, also remember the orientation.
Step 3. Clean the Film Adhesive
Once you have removed the films, the glue has likely remained stuck to the glass. Here comes the messy part. Use solvent to soften the glue and wipe it off with paper towels.
Try to cover the screen with paper towels soaked in paint thinner. Or use a piece of wood or plastic to scrape off the soft glue.
Be careful not to get paint thinner on the plastic frame, because it will dissolve it.
Step 4. Your Monitor Is Ready
After cleaning the adhesive, assemble everything back the way it was. Before even making the glasses, you can test the monitor with the polarized film.
Step 5. Pop the Lenses out
Whatever glasses you are using, pop the lenses out of them or take your glasses apart if it is possible.
Step 6. Scan, Trace, Cut
If you are going to use a cnc blade or laser cutter, scan and trace the parts.
These frames were scanned so that they could be used as a reference for the lens orientation. Remember, this is a polarized film so the angle is critical. Back and front also matters.
You can also tape the old lenses on the film and then cut them out with an x-acto knife.
Step 7. Reassemble Glasses
It’s time to assemble the glasses. Are you ready for some fun?
People might think you are crazy as they see you staring at a blank white screen and wearing sunglasses.
That makes it even more fun, doesn’t it?
| privacy_monitor.wmv | |
Credits: www.cutyourway.com
